
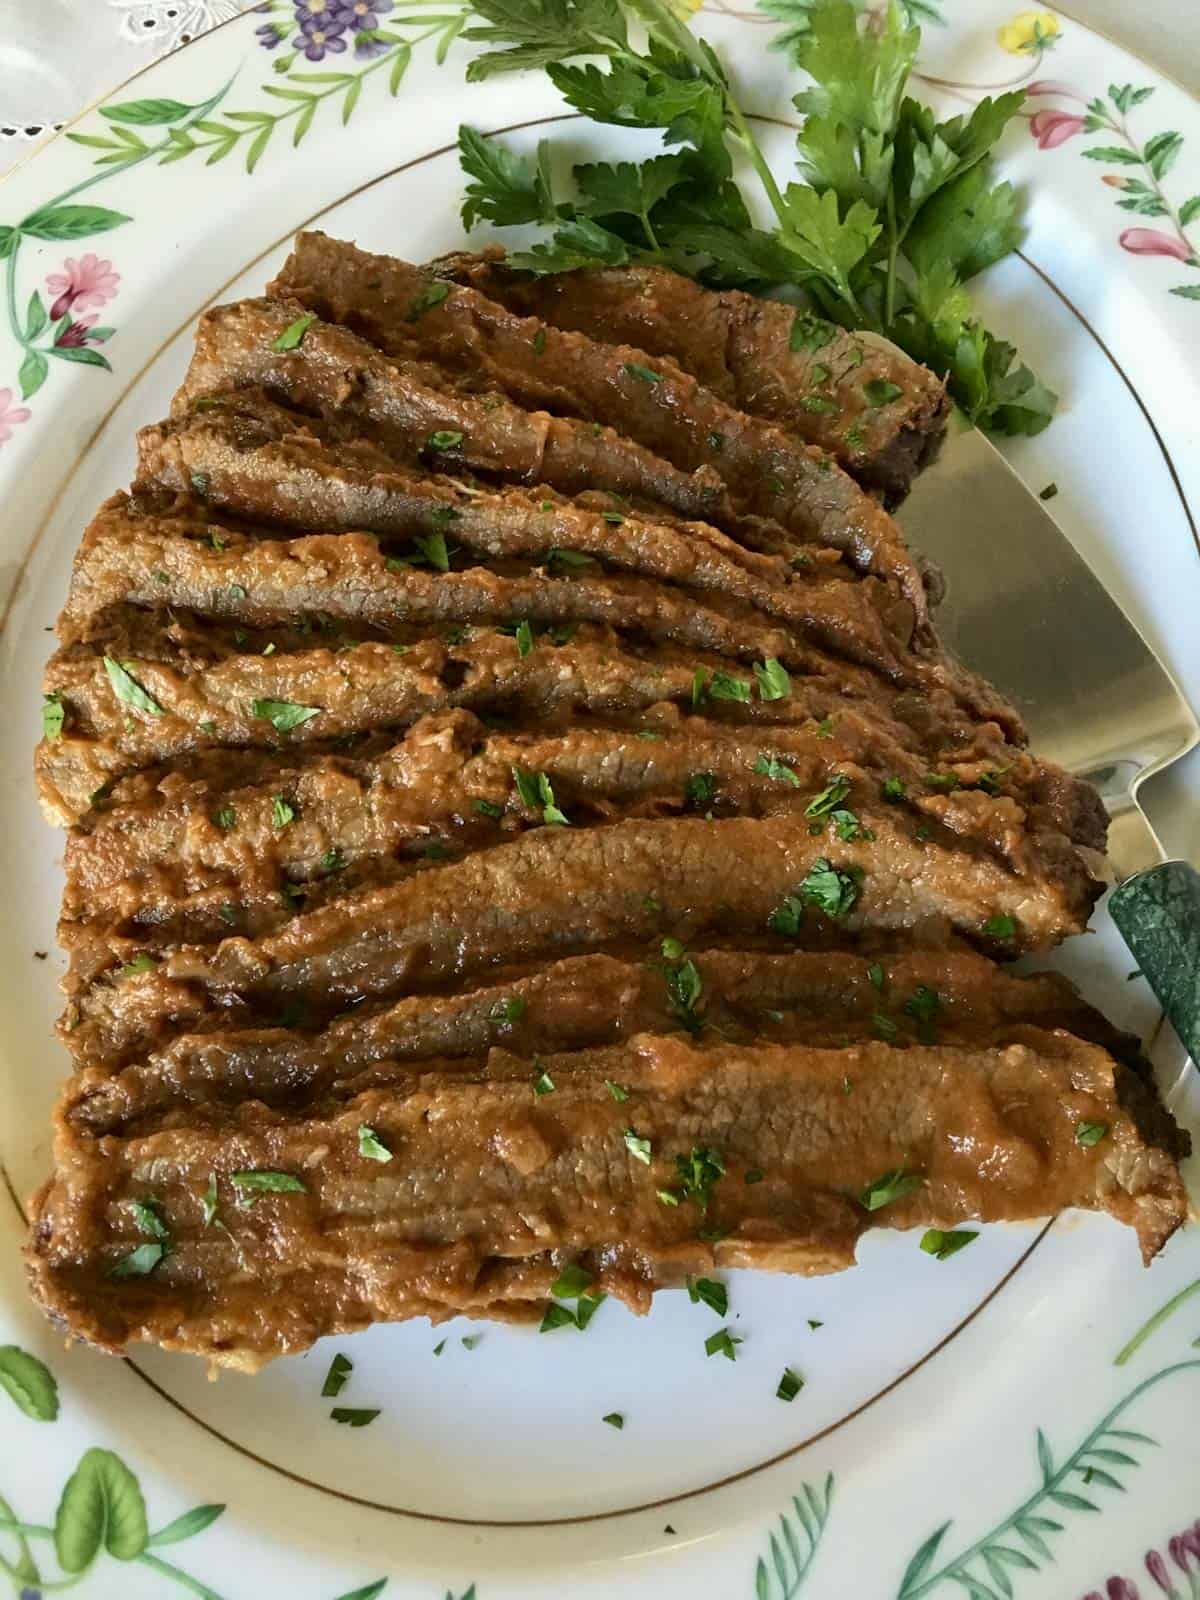
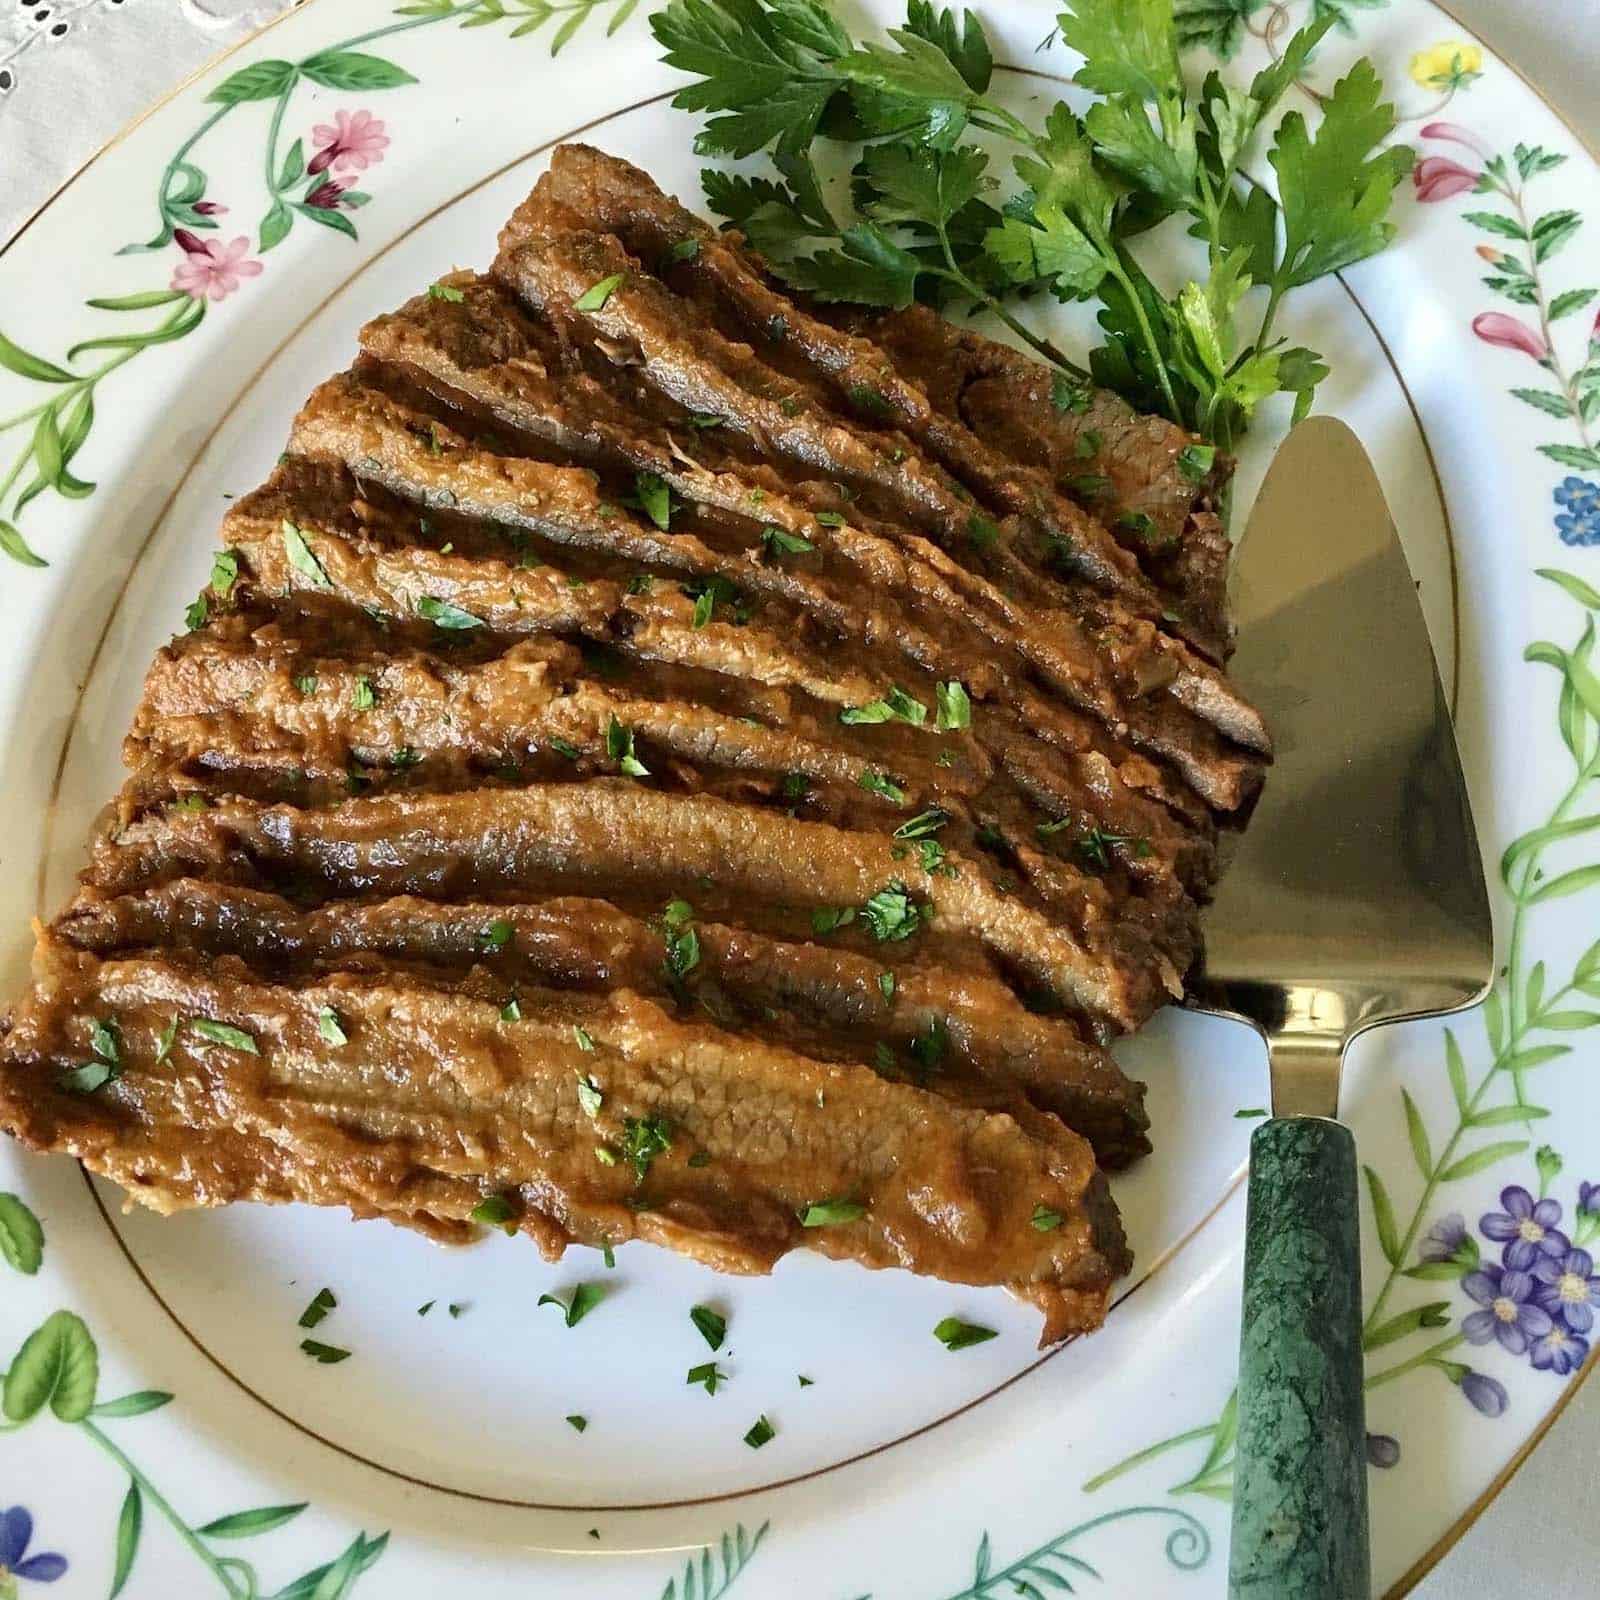
Deliciously tender braised beef brisket with onion gravy is the perfect holiday meal. This recipe includes my best tips and tricks for making a perfect brisket every time.
Brisket is a classic recipe every Jewish cook should know! It's great for serving a crowd, so it's perfect for the holidays. For more impressive main courses, try Za'atar Roasted Chicken with Lemon and Herbs, Baked Whole Salmon Fillet with Citrus and Fennel, and Chicken Marbella with dried fruits and olives.
For more recipes every Jewish cook should know, sign up for my mailing list to get the free eCookbook.
Jump to:
- Why You'll Love This Recipe
- Why brisket is popular for Jewish holidays
- Ingredient Notes and Substitutions
- What cut of brisket to buy?
- What’s the secret to a tender brisket?
- Step by Step Photos
- More tips for beef brisket
- Make Ahead
- Storage and Reheating
- What to serve with brisket
- More main course recipes
- Frequently Asked Questions
- Recipe
- Comments
Why You'll Love This Recipe
- Brisket is perfect for the holidays! Brisket is a popular standard on the Ashkenazi Jewish holiday dinner table.
- These tips will help you make a tender brisket. If this is your first time making one, don’t worry! As long as you cook it long enough, and keep adding more liquid as needed, it should eventually be juicy and tender.
- It’s mostly hands off. You need about 30 minutes of prep time, but after that, the oven does the rest of the work!
- Brisket is the best make ahead dish. Brisket gets even more delicious the next day, making this a great make ahead recipe.
- Makes a delicious brisket gravy. After cooking this brisket, the vegetables and pan juices melt down together to form the most delicious onion gravy. Making your own gravy tastes much better than using store bought.
Dana’s note: For decades my mom and her sisters made the most delicious brisket recipe for all the holiday dinners. They all made the same recipe, and they were well-known in their circles for their savory, oniony brisket - the kind that makes the whole house smell amazing and that makes your mouth water.
Later on as an adult, I learned that the main ingredients for their brisket recipe include onions, Lipton Onion Soup Mix, a can of beef broth, canned gravy, and ketchup. Their recipe is typical of their era in the 1970’s with convenience foods that were used in many recipes. I have spent many years trying to replicate their recipe with whole food ingredients, and I think my version comes very close. And it’s really tasty too.
Why brisket is popular for Jewish holidays
Brisket became a popular cut of meat to use for the holidays because it was a cheaper cut and it came in large pieces, making it handy to feed a crowd. It’s also a quick dish to prepare and the cooking time is hands off.
It’s the perfect make ahead dish because it tastes even better and is more tender the second day. Once you braise brisket in liquid for a long time, the tough cut of meat relaxes and becomes so tender and tasty. It’s a crowd pleaser.
Alas, brisket is not so cheap anymore, but the nostalgia and deliciousness of it call me to make it for many Jewish holidays throughout the year. It’s great for for Passover, Rosh Hashanah, the pre-Yom Kippur dinner, Sukkot, Hanukkah, and Shabbat.
Ingredient Notes and Substitutions
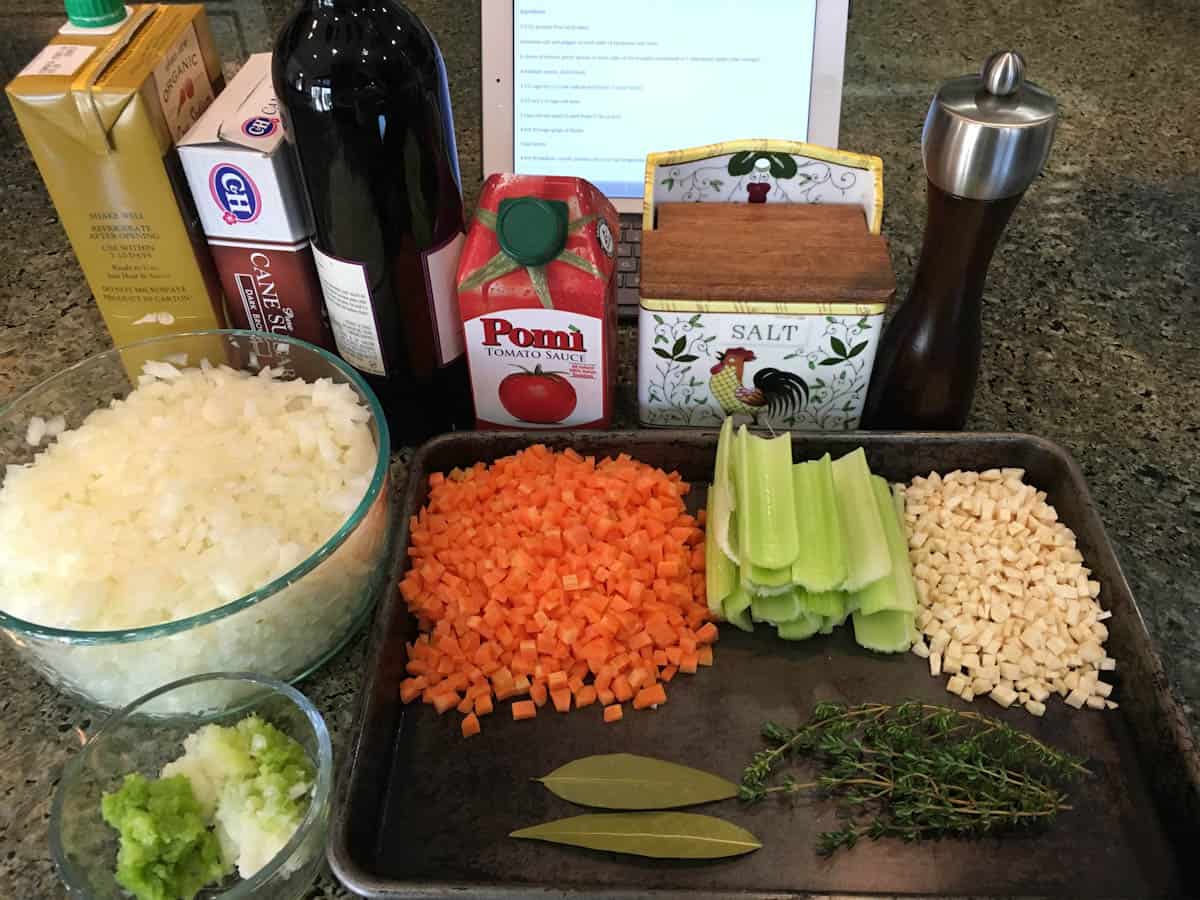
See the recipe card below for a complete ingredient list and measurements.
Jump to Recipe- Beef brisket - This recipe works for brisket that is 3-4 pounds. For larger briskets or double batches, you will need to add time to the cooking process. See section below for more information on cuts of brisket.
- Vegetables - Adding veggies to your brisket will add flavor to the meat and gravy. I use onions, celery, carrots, garlic, and parsley roots or parsnips. You can omit the last one if needed. Sometimes I add chopped white mushrooms for umami flavoring. Don’t use varieties of mushrooms that have black gills or they end up looking too black after the long cooking time.
- Herbs - This recipe calls for fresh thyme and a dried bay leaf. You can also add in what fresh herbs you have on hand.
- Red wine - Use something you would drink. Stick to dryer wines, like cabernet sauvignon, as opposed to sweeter ones like a port.
- Honey - Can substitute with brown sugar.
- Water - You may need to add some water throughout the cooking process. You can substitute with beef broth for added flavor.
What cut of brisket to buy?
There are two different cuts of brisket, the first cut (or flat cut), and the second cut (or deckle). The first cut is more lean, whereas the second cut is marbled with more fat.
I usually buy a first cut of brisket that is 3-4 pounds. For the holidays or feeding a large crowd, I will buy two briskets. You can cook them together in an extra large pan. It’s fine if the thinner part of each brisket overlaps each other, as they shrink as they cook.
You can buy a first cut, second cut, or a whole brisket to cook. People tend to say the second cut has more flavor since it is fattier, but I believe the first cut will be just as tender and juicy when braised in liquid.
What’s the secret to a tender brisket?
Brisket is a tough cut of meat, so it’s the low and slow cooking method that tenderizes it and makes it absolutely delicious. Brisket is more about the cooking technique and less about the specific ingredients.
My 4 best tips for making brisket:
- Cook it until it is fork tender. Literally poke the thickest part of the brisket with a fork until it gives easily.
- Braise the meat in liquid. Cooking the brisket in a liquid (especially a flavorful one) helps it maintain its juiciness. The liquid should come up the side of the brisket at least one-third to one-quarter of the way. As you check on the brisket, add water if liquid evaporates.
- Slice meat against the grain. Slicing beef against the grain (or lines) of the meat, helps it be more tender. Your knife needs to cross the lines in the meat and must not be parallel.
- Make the brisket the day before. This is one of those dishes that gets even better the next day. After cooking, cooling, and slicing, store the sliced brisket in a baking dish that fits the meat snugly. Pour gravy so that each slice is coated in gravy. Store covered in the refrigerator overnight. Remove hardened fat off the top. Reheat the brisket covered in the oven before serving for about 30 minutes at 350°F.
Step by Step Photos
See the recipe card below for complete directions.
Jump to RecipeFor best results, make this dish the day before you want to serve.
To prepare the beef brisket for cooking, season brisket on both sides with salt and pepper. Spread minced garlic on both sides.
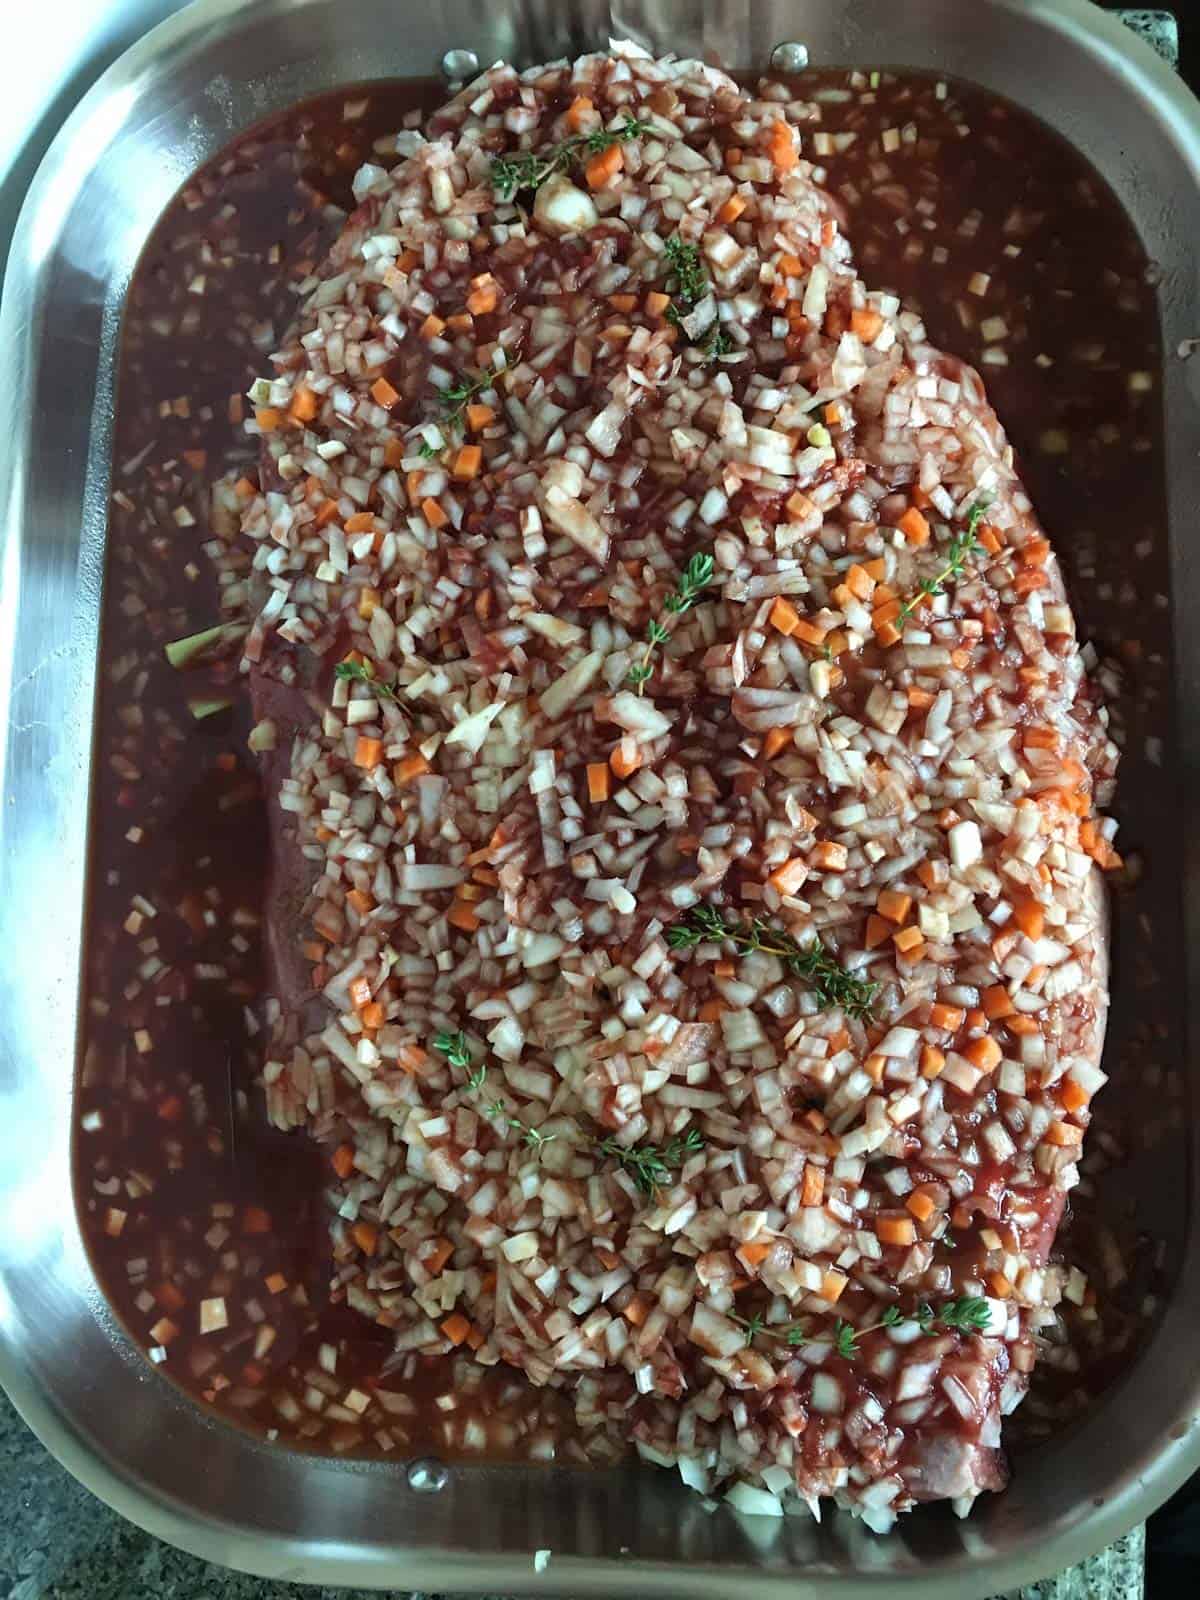
Layer celery with half of the carrot, parsnip and onion mixture on the bottom of a large roasting pan. Add the brisket fat side up, then add the rest of the veggies. Add thyme and bay leaf.
Combine tomato sauce, wine, vinegar, and honey together to make the braising liquid, then pour over the brisket and vegetables.
Cook brisket in a 350°F oven for 3-4 hours until it is fork tender. Check the brisket occasionally and add more liquid if needed.
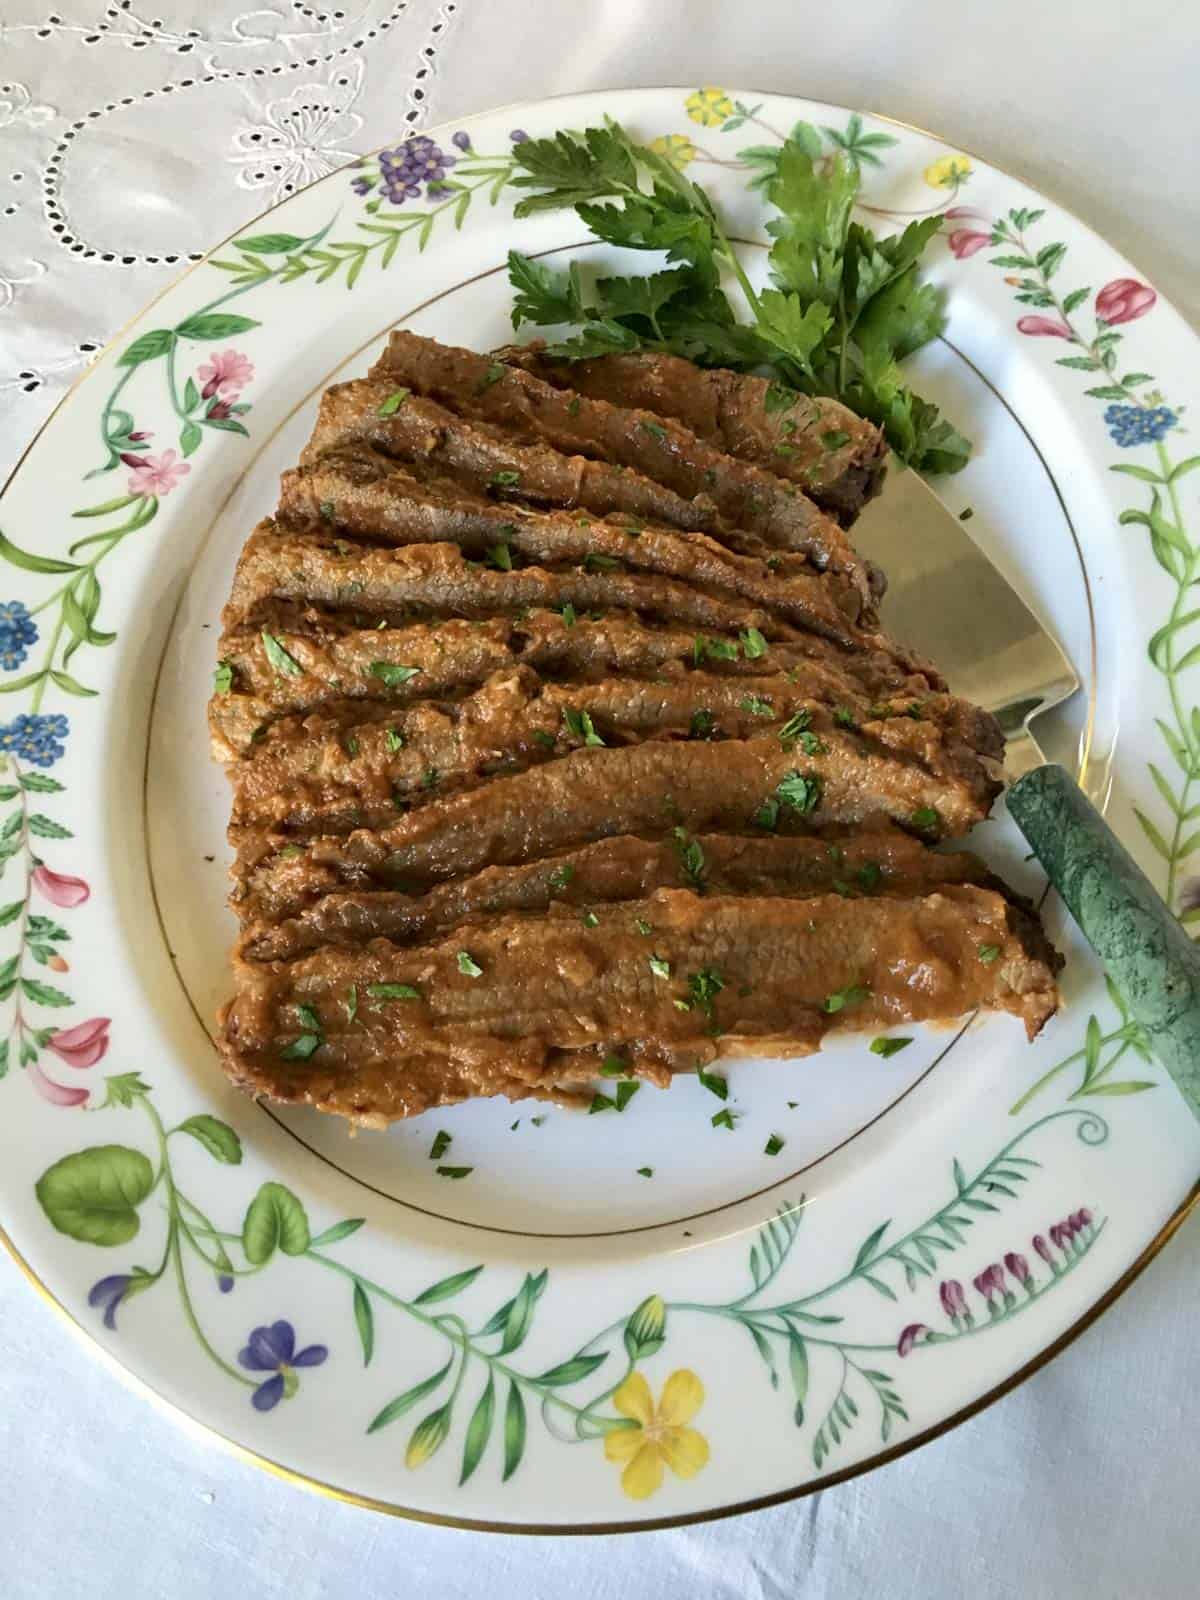
To serve, slice brisket against the grain, and serve topped with gravy.
More tips for beef brisket
- Brisket is hard to ruin, so don’t worry if this is your first time making one. Because it braises in liquid, you can cook it a bit too long and it still won’t be ruined. Just make sure you are adding more liquid as needed during cooking.
- Cook with the fat cap up. As the brisket cooks, the fat will render and drip down, adding to flavor and juiciness.
- If the gravy reduced down too much and the flavor is too concentrated, add a little water.
- Be sure to use enough salt, about 1 teaspoon per pound of meat. If the brisket tastes bland or flat, it needs more salt.
- Make sure the cooked brisket cools a little before you slice it. When it's hot, it's more likely to shred rather than slice.
- If the brisket is still a little pink inside after slicing, just reheat it for a longer amount of time and it will finish cooking.
- The fat will rise to the surface and harden when the brisket is refrigerated, so skim it off easily the next day before reheating.
Make Ahead
This is a great recipe to make ahead of time. Make the brisket as usual, and let it cool slightly on a cutting board. Slice the brisket, and arrange in a casserole dish, pouring the gravy over top. Cover and refrigerate until you are ready to heat and serve.
Alternatively, brisket freezes really well. Take a cooked, sliced, and cooled brisket, and place it in a casserole dish or foil pan along with the gravy. Wrap well and freeze. 1-½ to 2 days before serving, defrost the brisket in the refrigerator. Make sure that the casserole dish is not frozen or ice cold when you put it in a hot oven or else it may crack or break.
Storage and Reheating
How to store: Store leftover brisket in an airtight container covered with gravy in the refrigerator for 3-4 days. Cooked brisket also can be frozen for up to 6 months. Have leftover brisket? It will go perfectly in these Shortcut Brisket Kreplach!
How to reheat: Take brisket out of the refrigerator a half hour to 1 hour before to come to room temperature. Preheat oven to 350°F. Reheat covered (with foil) for about 20-30 minutes. Remove cover if you want to speed up reheating. Test a center slice to see if it is hot. Gravy will be bubbling. If you need to adjust the brisket (like if today it is still slightly pink in center or not quite tender), reheat a bit longer for 45 minutes or up to an hour.
What to serve with brisket
- Crispy Smashed Fingerling Potatoes
- French Green Beans with Mustard Shallot Sauce
- Easy Carrot Soufflé
- Butternut Squash, Pomegranate, and Arugula Salad
- Broccoli Kugel
- Modern Roasted Tzimmes
- Parve Noodle Kugel
- Mini Potato Kugels
More main course recipes
- Moroccan Lamb Stew
- Slow Cooker BBQ Brisket
- Baked Whole Salmon Fillet with Citrus and Fennel
- Za'atar Roasted Chicken with Lemon and Herbs
- Chicken Marbella
Frequently Asked Questions
Yes, brisket can be a delicious and tender cut of meat if cooked properly. Brisket contains collagen and connective tissues, so it must be cooked low and slow to make it tender.
Cooking a brisket in the oven at 350°F should take between 3-4 hours. Cook the brisket until it is fork tender.
The best cooking method for brisket is cooking it long and slow. Methods like this recipe with a slow braise or using a slow cooker both work well.
Linger at Dana's Table a little longer for more free recipes.
Subscribe to my newsletter, and follow along on Facebook, Instagram, and Pinterest for the latest updates.
Recipe
Braised Brisket with Onion Gravy
Equipment
- large, heavy roasting pan or roaster
- 4 cup measuring cup or medium bowl
- aluminum foil
- Knife
- Cutting board
- Pyrex or ceramic baking dish
Ingredients
- 3-4 pounds beef brisket
- 4 teaspoons kosher salt divided
- 4 large garlic cloves minced
- 3 celery ribs
- 1 large onion diced small
- 2 carrots diced small
- 2 medium parsley roots or parsnips diced small, optional
- 4 sprigs thyme
- 1 bay leaf
- 1 ½ cups tomato sauce about 14 ounce can
- 1 cup red wine
- 1 ½ tablespoons apple cider vinegar
- 1 heaping tablespoon honey or packed brown sugar
- water during cooking
Instructions
- Make your brisket the day before serving for ultra tender brisket.
- Preheat the oven to 350°F. Adjust the oven rack to just below center.
- Sprinkle 1 tablespoon salt and pepper on both sides of the brisket. Then spread minced garlic on both sides as well. Layer celery and half the diced onions, carrots, and parsnip (optional) in the bottom of a large, heavy roasting pan or roaster. Place brisket on top, fat side up. Place the other half of the onions, carrots, and parsnip on top of the brisket. Sprinkle the thyme and bay leaf on and around the brisket.
- In a 4 cup measuring cup or medium bowl, make the braising liquid by mixing tomato sauce, 1 teaspoon salt, a few grinds of pepper, wine, vinegar, and honey. Pour liquid over brisket and vegetables. Liquid should come about ¼ to ⅓ the way up the side of the brisket.
- Cook brisket covered in a 350°F oven for 3-4 hours. Use the roaster lid or cover tightly with heavy duty aluminum foil. Set a timer to check the brisket every hour and add a little water as needed. Cook the brisket until fork tender, about 3-4 hours. Stick a fork in the thickest part of the brisket and wiggle the fork slightly. Its ready when the meat feels soft and tender.
- Take the brisket out and let cool slightly on a cutting board. Slice the fat cap off the brisket with a knife. Slice the brisket against the grain: your knife should cut across the lines of the brisket muscles. The cuts don’t have to be exactly perpendicular to the lines. Often times a brisket has sections with the lines running one way for most of the brisket, then there could be a section with lines running a different way, so check before you start to cut in case one section needs to be cut from a different angle. Taste the brisket with gravy on it now and the flavor should be delicious, but if it needs more seasoning, add it now. It will be even more tender tomorrow.
- Reassemble sliced brisket in a pyrex or ceramic baking dish so the meat will fit fairly tightly and each slice will stay standing up. Pour vegetables and gravy over and between the slices. Gravy should go almost all the way up the brisket. Cover dish well with aluminum foil. Put any extra gravy in a storage container with a lid. Refrigerate brisket and gravy overnight.
- Reheat and serve on day 2 for ultra tender brisket. Take brisket out of the refrigerator 1 hour before heating to come to room temperature. Remove any fat that has hardened on the top of brisket or gravy. Throw out the fat into the trash, not the sink, or it could clog it.
- Preheat oven to 350°F. Reheat brisket covered with foil for about 20-30 minutes. Can take the cover off if you want to speed up reheating. Test a center slice to see if its hot. Gravy will be bubbling. If your brisket did not cook quite enough yesterday (like if today it is still slightly pink in the center or not quite tender) reheat a bit longer, about 45 minutes to an hour, so the brisket continues to tenderize in the gravy. Serve immediately with gravy.
Notes
- Make ahead directions: This is a great recipe to make ahead of time. Make the brisket as usual, and let it cool slightly on a cutting board. Slice the brisket, and arrange in a small casserole dish, pouring the gravy over top. Cover and refrigerate until you are ready to heat and serve.
- How to store: Store leftover brisket in an airtight container covered with gravy in the refrigerator for 3-4 days. Have leftover brisket? It will go perfectly with these Shortcut Brisket Kreplach!
- How to reheat: Take brisket out of the refrigerator 1 hour before to come to room temperature. Preheat oven to 350°F. Reheat covered (with foil) for about 20-30 minutes. Remove cover if you want to speed up reheating. Test a center slice to see if it is hot. Gravy will be bubbling. If you need to adjust the brisket (like if today it is still slightly pink in center or not quite tender), reheat a bit longer for 45 minutes or up to an hour.
- Cook it until it is fork tender. Literally poke the thickest part of the brisket with a fork until it gives easily.
- Braise the meat in liquid. Cooking the brisket in a liquid (especially a flavorful one) helps it maintain its juiciness. The liquid should come up the side of the brisket about one-third to one-quarter of the way. As you check on the brisket, add water if liquid evaporates.
- Slice meat against the grain. Slicing beef against the grain (or lines) of the meat, helps it to be more tender. Your knife needs to cross the lines in the meat and must not be parallel.
- Make the brisket the day before. This is one of those dishes that gets even better the next day. After cooking, cooling, and slicing, store the sliced brisket in a baking dish that fits the meat snugly. Pour gravy so that each slice is coated in gravy. Store covered in the refrigerator overnight. Reheat the brisket covered in the oven before serving for about 30 minutes at 350°F.
Nutrition
Nutritional Disclaimer
Nutritional information is an estimation only.

Courtney says
This was an absolute delight!! We had it for New Years Eve dinner, and everyone was in love. We made exactly as written and were so thrilled with how it turned out. Thank you so much for sharing this recipe - it will be our family’s go-to!
Dana Shrager says
So lovely to hear. It's my go-to recipe too 🙂
BJ says
thx for sharing everything sounds so delicious Happy Healthy New Year to you and your family ✡️
Dana Shrager says
Happy New Year to you as well. I hope you get a chance to enjoy this recipe.
JuneBug says
I made this last week, using a "tip" cut of brisket. A few things of note from my experience: My cut was a little smaller, so it did cook quicker. I just checked it hourly, and mine was fork tender at about 2.5 hours. Although my cut of meat was smaller, I still used the full amounts for the "gravy". I'm glad I did. And lastly, I didn't chop my vegetables finely enough, so when the meat was finished and the "gravy" was really chunky, I poured the gravy into a blender and pureed it. After that, I followed the rest of the instructions to slice it and store the meat and the gravy overnight. Even though it was a smaller cut of the meat, it still made quite a few servings. The two of us ended up eating it first as a "meat" with side dishes, then as meat with sauce served over rice, and finally I fed 4 of us by chopping up the remaining meat and serving it all over fettucine. My sister, who enjoyed the last of it over the pasta, has a larger family and has asked for the recipe.
Dana Shrager says
Thank you for the helpful recipe tips. I'm glad the recipe was successful for you. I like your leftovers serving ideas of using the meat and gravy as a sauce for rice or pasta.
Joy says
Can’t wait to try brisket recipe
Dana Shrager says
Enjoy! Happy Passover.