
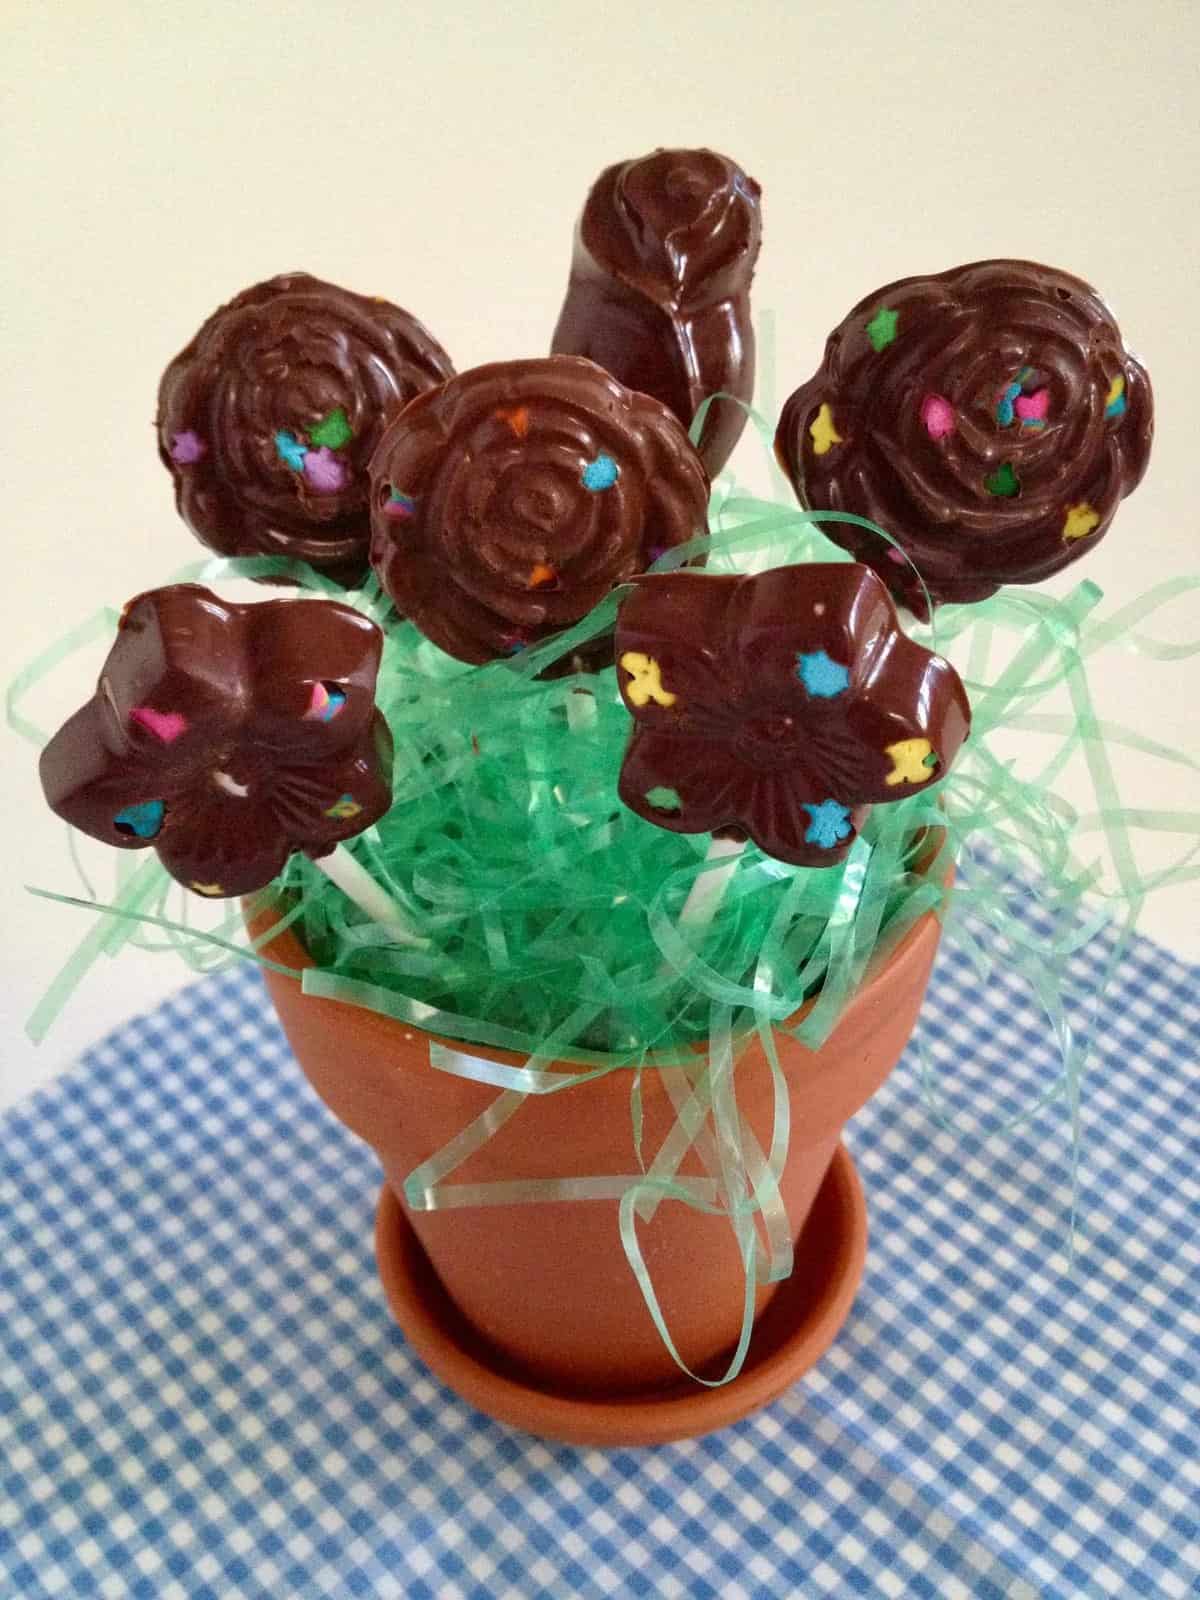
These adorable homemade chocolate lollipops are a fun and easy treat to make with the kids. The lollipops make such cute centerpieces for the holidays.
For more kid friendly recipes, check out Lavash Flatbread Pizzas, Udon Noodle Soup, and Spritz Sprinkle Cookies.
Jump to:
Why You'll Love This Recipe
- Easy method of tempering the chocolate in the microwave - no thermometer needed!
- Fun treat to make with the kids for holidays, a special occasion, or party favors for birthday parties.
- Arrange them in foam core to make a cute centerpiece that doubles as a special treat.
Dana's note: I remember making homemade molded chocolate with my grandma when I was a kid. Making chocolate candy was always a fun project. I inherited my grandma's candy molds, and it has been such a joy to share them with my kids who have so much fun making them. I love that the tradition of making these easy homemade chocolate lollipops continues on with the next generation.
Ingredients and Equipment
See the recipe card below for a complete ingredient list and measurements.
- Chocolate - The kind of chocolate you use is important since chocolate is the main ingredient in these lollipops. Pick a good quality, nice tasting chocolate. I prefer melting wafers, but bar chocolate works too. Select your choice of dark, semi-sweet, or milk chocolate. Try Guittard Chocolate Melting Wafers or Ghirardelli Chocolate Melting Wafers.
- Olive oil - This helps to smooth out the chocolate and give it a nice shine.
- Lollipop sticks - 4 inch lollipop sticks can be purchased online or at craft stores like Michaels.
- Chocolate lollipop molds - I used flower shaped lollipop molds. Mine are vintage, but plastic molds are still made today. Or use a a silicone mold which makes popping out the finished product easier. If you don’t have a chocolate mold, you can pour the chocolate into circles on wax paper and put the stick into the chocolate before it hardens.
- Decorative sprinkles - If you’re making these for a holiday, choose holiday themed colors, or pick sprinkles with different colors and shapes just for fun.
Step by Step Instructions
See the recipe card below for complete directions.
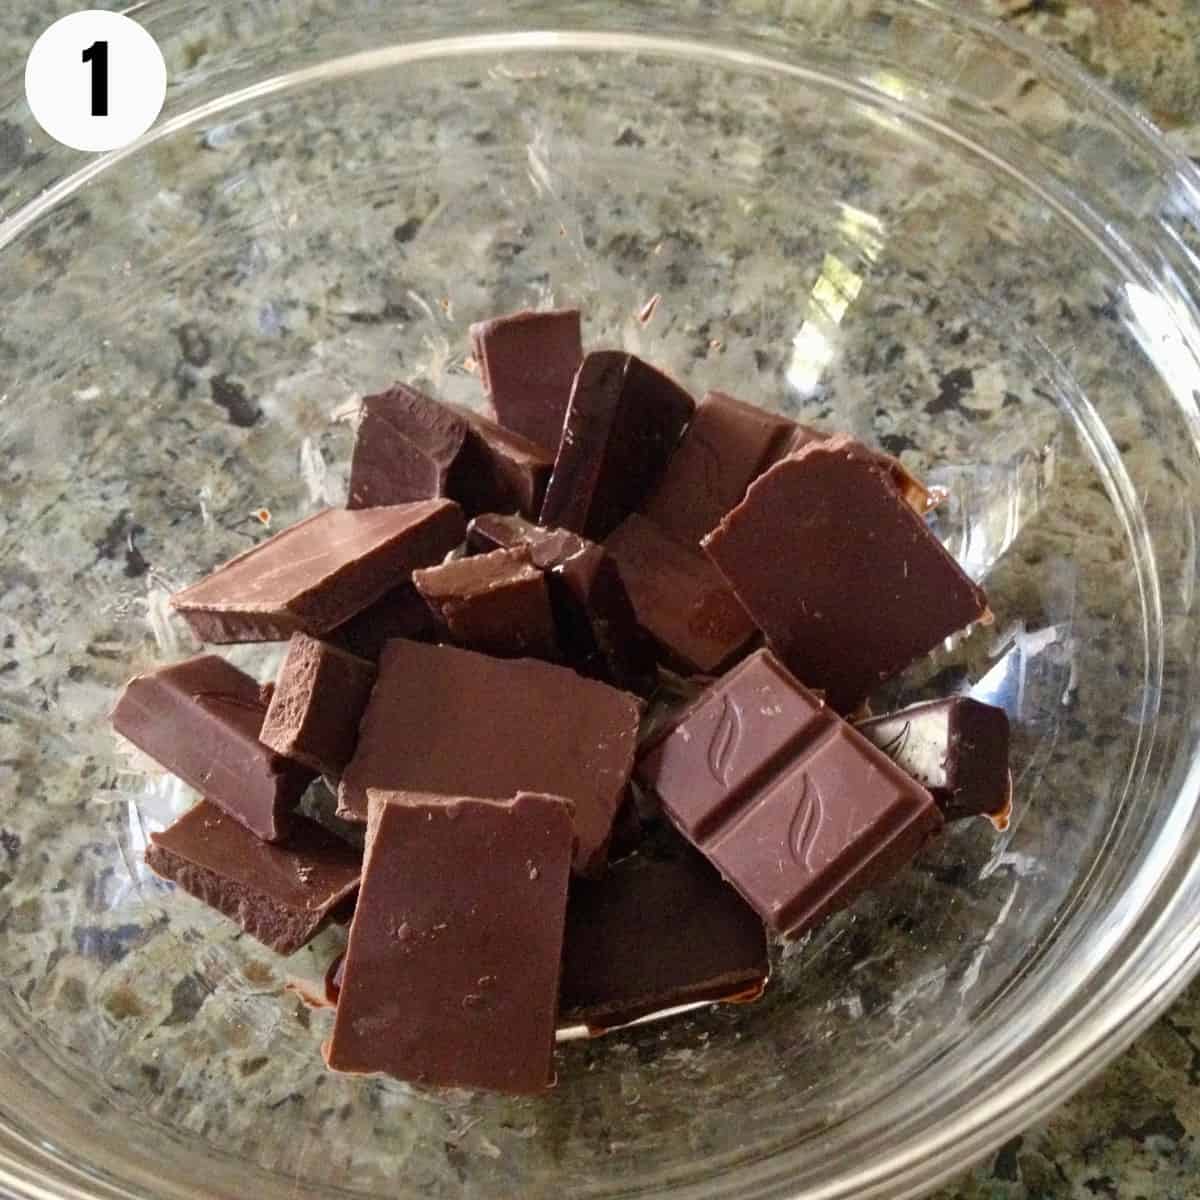
STEP ONE. Melt the chocolate:
Add about ¾ of the chocolate in a microwave safe bowl. Microwave at 50% power in 30 second increments, stirring in between, until all the chocolate is melted.
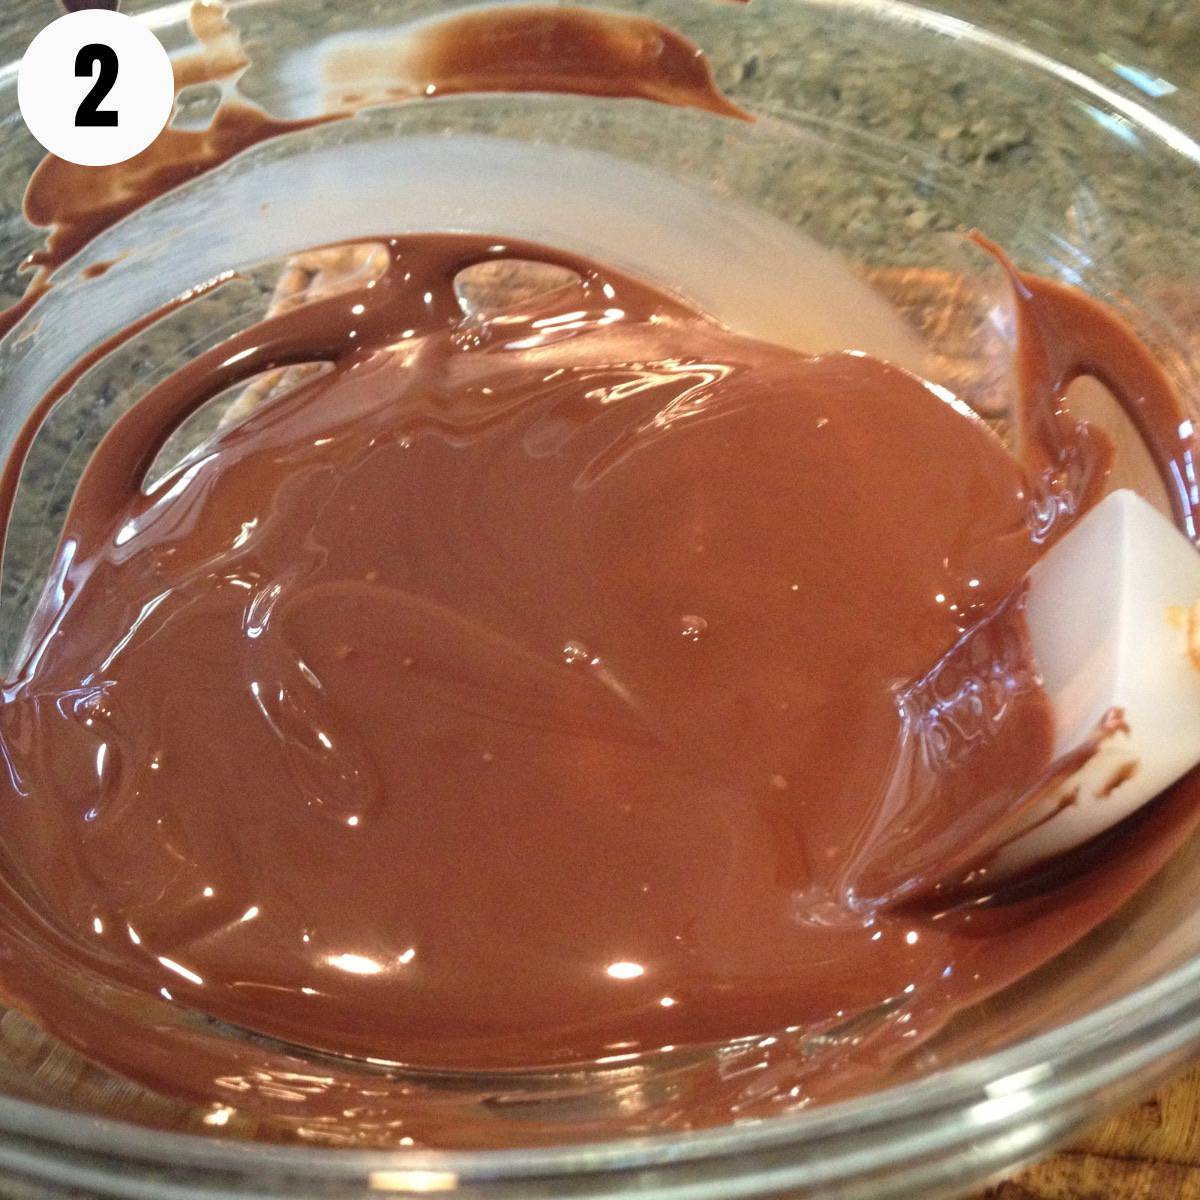
STEP TWO. Temper the chocolate:
Next add the remaining chocolate, a little at a time to the melted chocolate, stirring in between, until all the chocolate has melted and is smooth.
Then stir in the olive oil.
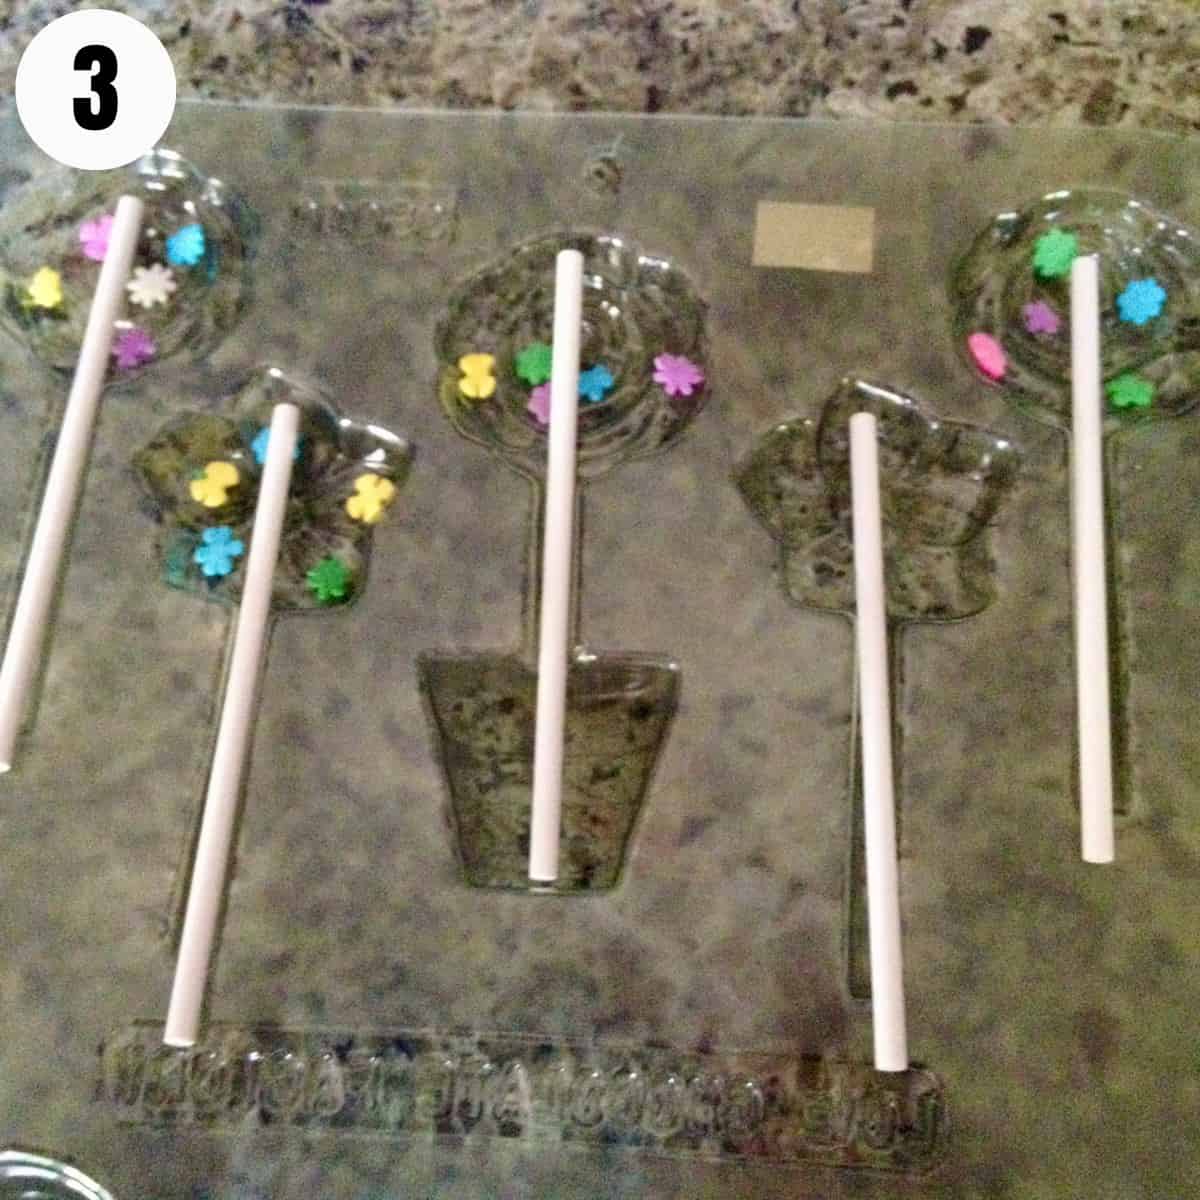
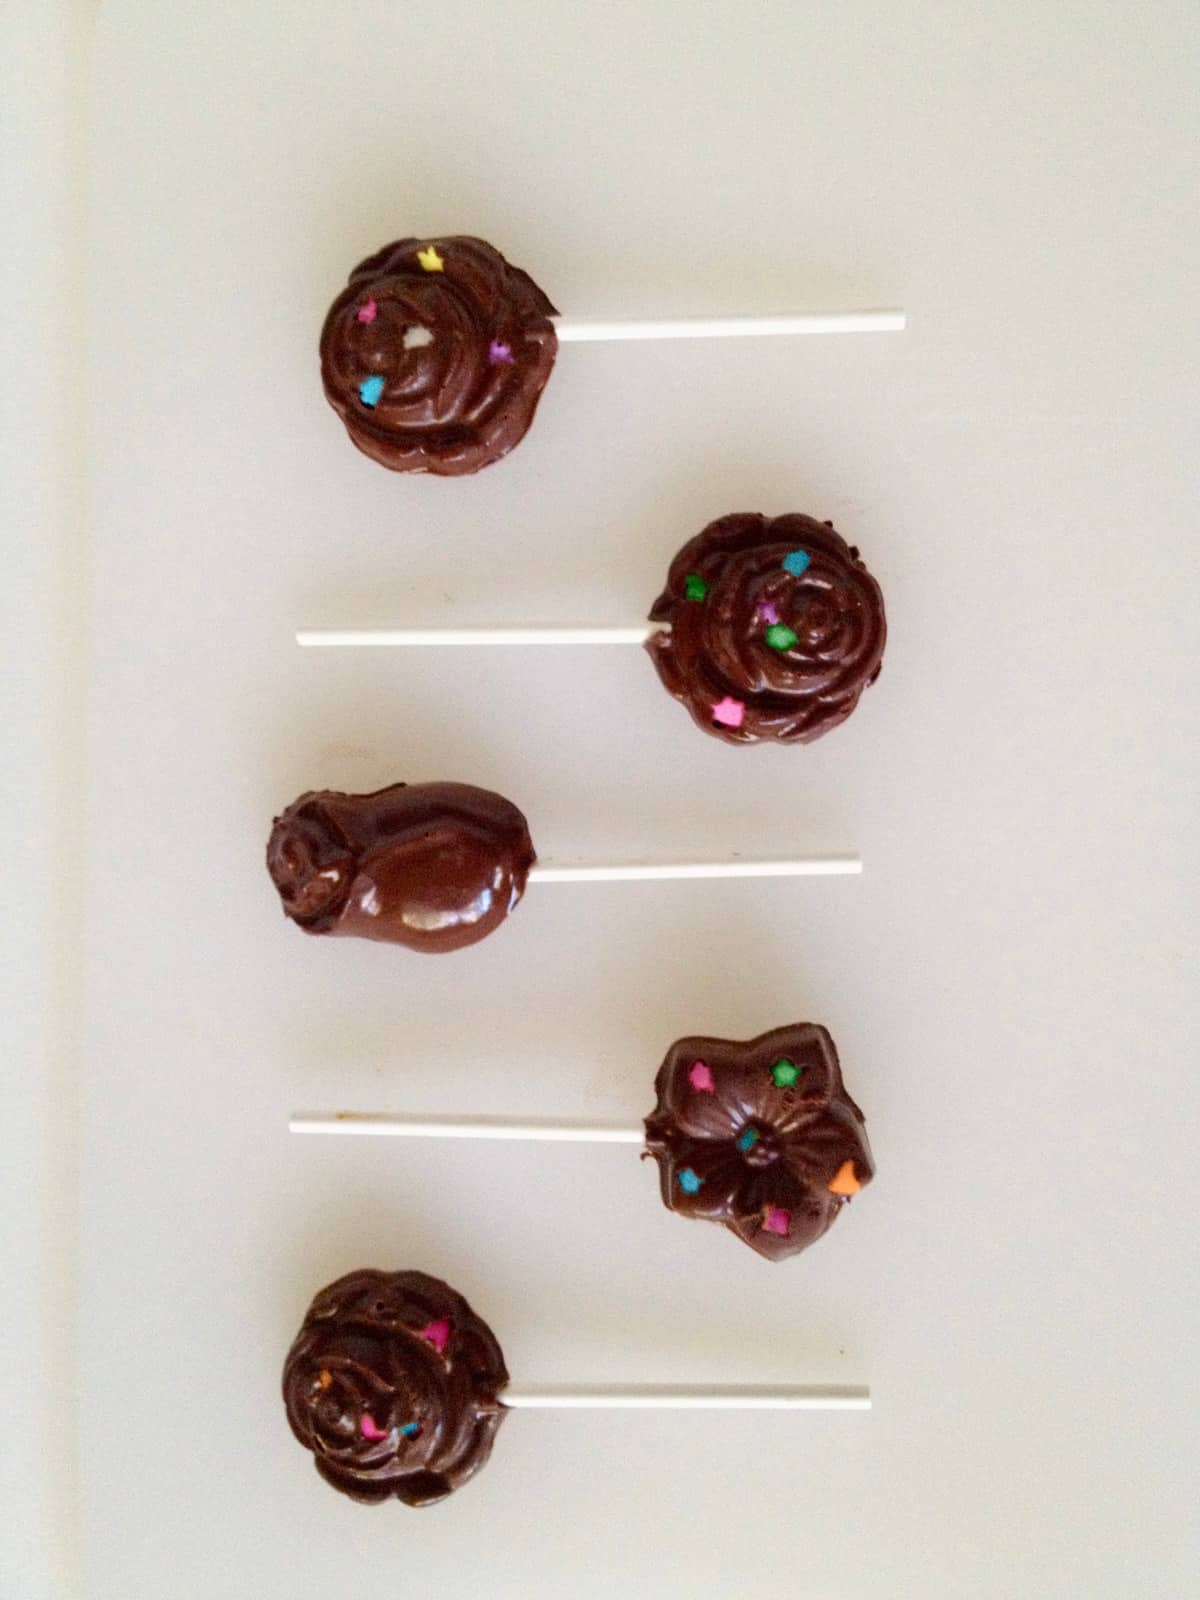
STEP THREE. Put sprinkles and sticks in the bottom of the mold.

STEP FOUR. Carefully spoon melted chocolate into the lollipop molds. Fill exactly to the top. Add more sprinkles on top.
STEP FIVE: Chill the filled chocolate lollipop mold flat in the refrigerator until hardened, about 15 minutes. If using a silicone mold, stabilize the mold by placing it on a tray.
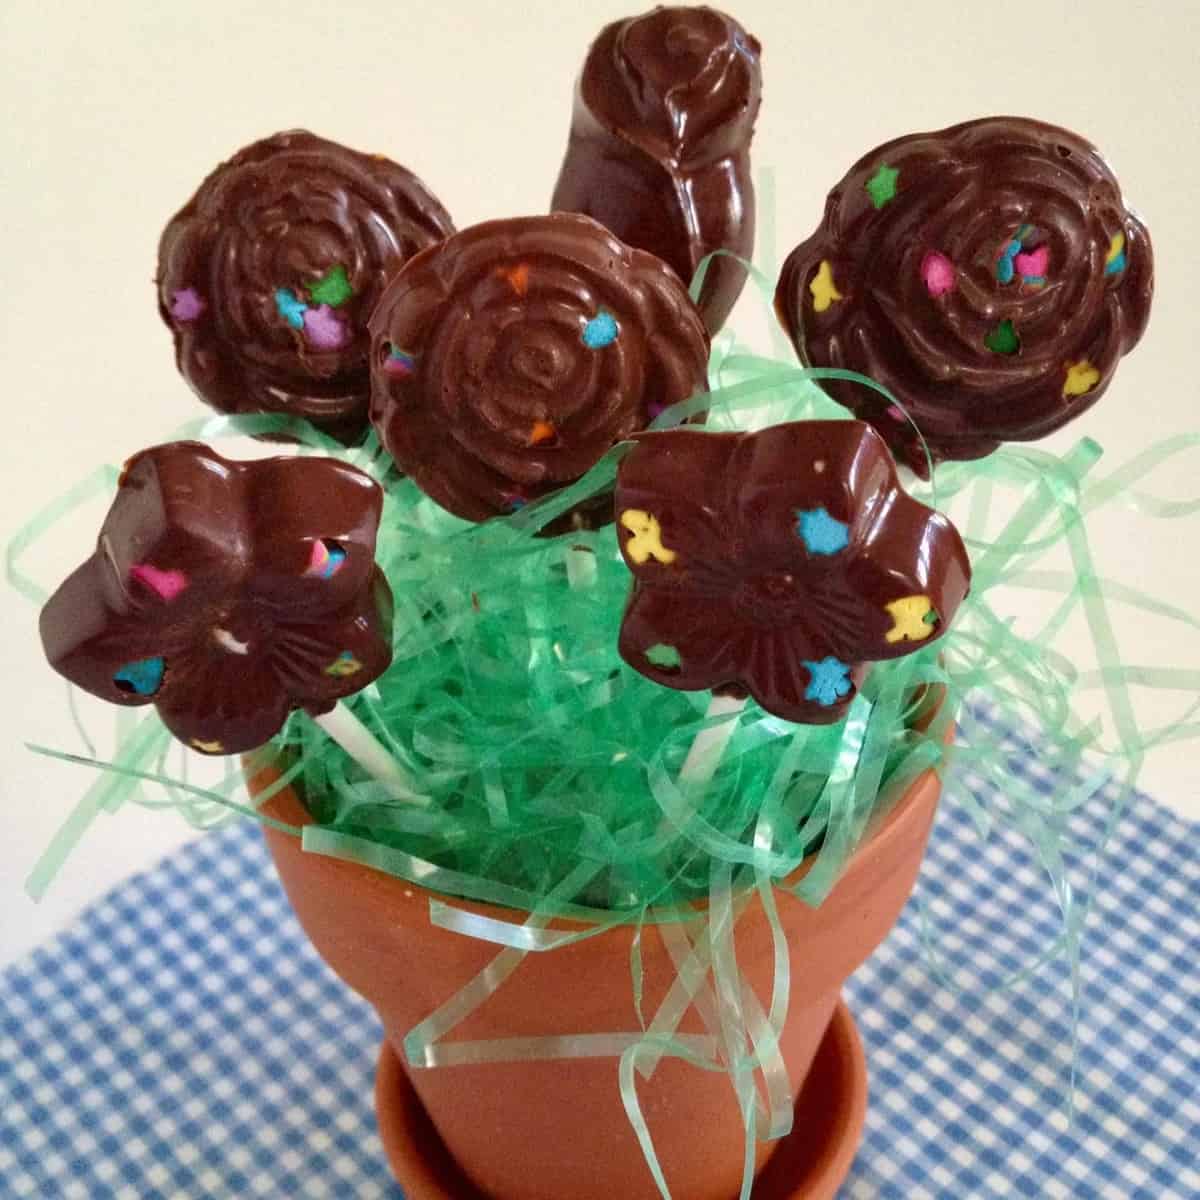
STEP SIX: Carefully unmold by pressing gently on the underside of each mold. Arrange chocolate lollipops in the pots to make fun centerpieces.
Top Tips
- Take care not to burn the chocolate by microwaving it at half power for about 30 seconds at a time. Using high temperatures can cause it to burn.
- Sometimes the chocolate still has a small lump remaining, but when stirred, will liquefy.
- Temper the chocolate so that the chocolate doesn't bloom, which is a white film on the surface of the chocolate. The bloom is edible but less attractive.
- Be careful not to get any water or steam in the melting chocolate or it will seize up.
- Place the sticks high up in the molds, but not quite to the top, so that the chocolate will stay attached to the sticks.
Decorating ideas
- Make the flower pots: Use flower shaped chocolate molds for the spring holidays like Passover and Easter. Arrange the chocolate pops in a floral centerpiece. Use a small clean flower pot, then add floral foam and cover with Easter basket faux grass or shredded paper basket filler. Stand up the flower pops by inserting them into the foam.
- Purim and Easter baskets: Give the chocolate pops as gifts in a mishloach manot basket for Purim or in an Easter basket. Cover each lollipop with a small cello bag. Remember to include Hamantaschen cookies in the Purim basket too.
- Use heart shaped molds for Valentine’s Day with pink and red hearts candy sprinkles.
- Try crushed candy canes to decorate the chocolate for Christmas, or use Hanukkah shaped lollipop molds and blue and white sprinkles.
- Use rainbow sprinkles for a birthday celebration.
Make Ahead and Storage
Make molded chocolate ahead up to one month in advance.
Store chocolate lollipops in an airtight container in a dark, dry place at room temperature.
More dessert recipes
- Easy, Mini Chocolate Croissants
- Italian Chocolate Chip Cookies
- Passover Flourless Chocolate Cake with Nutella
- Date Maamoul Cookies
Frequently Asked Questions
Depending on how much chocolate the molds hold, they should set in 15-30 minutes. Putting them in the refrigerator helps them to set quicker.
Tempering chocolate creates a smooth and glossy surface that has a snap when you bite into it. Although you can make this recipe without tempering the chocolate, it may develop a bloom - a white coating on the chocolate - if not eaten right away. The white coating is edible, but less attractive.
Linger at Dana's Table a little longer for more free recipes.
Subscribe to my newsletter, and follow along on Facebook, Instagram, and Pinterest for the latest updates.
Recipe
Homemade Chocolate Mold Lollipops
Equipment
Ingredients
- 12 ounces chocolate melting wafers or chocolate baking bar
- 1 dash olive oil for shine
- decorative sprinkles
Instructions
- Add about ¾ of the chocolate in a microwave safe bowl. Microwave at 50% power for 30 second increments, stirring in between, until all the chocolate is melted. Take care not to burn the chocolate. Sometimes the chocolate still has a small lump remaining, but when stirred, will liquefy.
- To temper, add the remaining chocolate, a little at a time to the melted chocolate, stirring in between, until all the chocolate has melted and is smooth.
- Stir olive oil into the melted chocolate to help give the chocolate extra shine.
- Put sprinkles in the bottom of the chocolate molds. Carefully spoon the melted chocolate into the molds. Fill the molds exactly to the top. Add the sticks and some more sprinkles on top.
- Chill the mold flat in the refrigerator until hardened, about 15 minutes. Carefully unmold by pressing gently on the underside of each mold.
- Arrange chocolate lollipops in the pots to make fun centerpieces.
Notes
- Store chocolate lollipops in an airtight container in a dark, dry place at room temperature.
- This method of melting most of the chocolate first, then adding the remaining chocolate a little at a time is called tempering. Tempering chocolate creates a smooth and glossy surface that has a snap when you bite into it. This recipe still works without tempering the chocolate, but it may develop a bloom - a white coating on the chocolate - if not eaten right away. The white coating is edible but less attractive.
Nutrition
Nutritional Disclaimer
Nutritional information is an estimation only.


Kathy Gallagher says
Very cute!!
Dana says
You're getting a preview of my holiday table.